
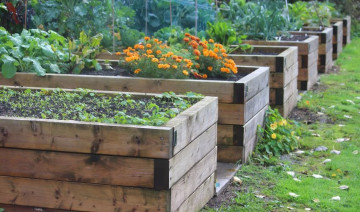
Raised beds let you grow veggies, herbs, and flowers with better soil control and less bending. Pressure-treated lumber gives you rot-resistant walls that stand up to moisture season after season. Here’s your quick guide:
Choosing Pressure-Treated Lumber
Look for Ground Contact rating (UC4A or UC4B) for direct soil contact.
Common dimensions: 2×6 or 2×8 boards for 6–8 inch bed walls; 4×4 or 6×6 for corner posts.
Cutting and Assembly
Measure Twice, Cut Once: Mark your board lengths on both ends to ensure square corners.
Use the Right Saw Blade: A carbide-tipped blade designed for treated lumber reduces splintering.
Pre-Drill Holes: Prevents splitting when driving deck screws or outdoor-grade lag bolts.
Safety and Soil Considerations
Wear gloves and a dust mask when cutting treated wood.
Line the interior with landscape fabric if you’re concerned about any leaching.
Fill beds from the bottom up: gravel for drainage, then a mix of topsoil and compost.
Maintenance Tips
Inspect annually for loose screws or boards.
A light coat of exterior stain or sealant every 2–3 years keeps the wood looking fresh.
Swing by our lumberyard for premium pressure-treated boards, hardware kits, and a chat with our woodworking pros. Your garden’s next chapter starts here!